How to Custom-Build a Standing Desk
When I first heard about how beneficial it would be to stand all day, I immediately decided to throw together a sloppy standing desk at work with stacks of old textbooks. Then I got hard-core and custom-built a better one at home.

Photo Credit: Jeff Sanders
Let’s be clear – I am not a handyman. I do own a toolbox, but only because it was a gift.
I am an Eagle Scout and do have a few skills like building fires and sneaking alcohol on camp outs, but I am a total novice when it comes to construction.
How to Custom-Build a Standing Desk
I have an old desk from Staples that I first got when I went to college a decade ago. I am still using that same tan desk on wheels, which you can see in the pictures.
Surprisingly, the desk has held up quite well, but it doesn’t look snazzy. It’s functional – not beautiful.
I had a rather nice desk chair (that I gave away) in my home office (which doubles as a spare bedroom, storage closet, and hiding place from my wife).
The Design
I drew a basic picture of what I was planning to build, which included just 3 wooden boards that would be fastened to each other and my current desk with screws.
I measured the height of the support boards from the current desktop to just below my elbows.
The goal is for the height of the desk plus your keyboard to be slightly below the height of your elbows for optimal ergonomics and comfort.
Supplies I Collected
I made a trip to Home Depot to collect my supplies:
- 1 large plank of 3/4 inch thick Plywood
- 1 Box of 1-inch Screws
- 1 Small Can of Wood Primer
- 1 Small Can of Wood Stain (dark cherry color)
- 1 Small Paint Brush
- 1 Small Package of Sandpaper
I chose the highest quality plywood to maximize the strength in order to hold my large iMac and anything else I throw on top. It’s more expensive but worth it.
I had the guys at Home Depot cut the wood for me, based on the dimensions I measured.
Also, I already owned an electric drill, which you will need unless you’re super strong and willing to use an old-fashion screwdriver.
Construction
I first vigorously sanded all of the wood to create the smoothest surface I possible could.
I then painted on the primer, waited for it to dry, and then painted all sides of the wood with the stain.
Your drying time may vary, but I waited about 3 days.
I then fastened the boards together with screws, mounted the new desk on top of the current desktop, and screwed the new desk into the old desk.
I also created a hole in the back board for wires to go through.
You can see there is a space under the new desktop and above the old one. I store many things in there and it has proven to be very useful.
Final Product
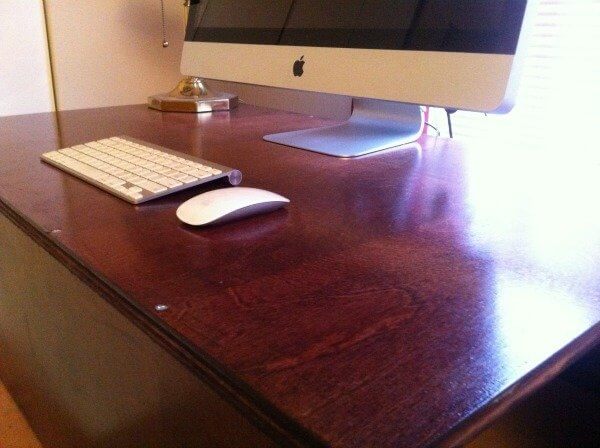
As you can see in the pictures, the color of my standing desk does not match the old desk, but I didn’t build this thing to look pretty.
I really love how it turned out and I have used this desk without issue for over a year.
The desktop is very smooth and sturdy.
I plan to use this desk for as long as possible, but I may ultimately purchase an adjustable standing desk if I care to spend the money.
Are You Up for the Challenge?
If you have any doubts about creating, building, or buying your own standing desk, then just put one together quickly and try it out for a few days.
I truly love my desk – not for its sex appeal – but for the fact that I get to stand and work all day and reap all the benefits.
Seriously, you need to do this.